 Check out the details here: http://www.thingiverse.com/thing:10531
Thursday, August 4, 2011
Friday, December 3, 2010

Wednesday, December 1, 2010
PLA: Highly Recommended
I purchased PLA from Makerbot and MakerGear, and am happy to say that PLA has definitely lived up to the hype.

I've had no noticeable warping, even when printing the largest part sizes possible on the Makerbot, like these planetary gear quarters that are part of a prototype for one of our Senior Design groups. PLA forms a harder part than ABS, which is preferable for sharp edged parts such as these.

PLA is a bit more demanding than ABS, in that as it melts it goes through a "gummy bear" stage, which can jam in the nozzle. When warming up, it requires a bit of finesse that ABS didn't need, in order to get started. I use the same temperature settings as with ABS (225C target), since the material I received has a declared melting temperature a degree higher than what I observed with ABS (ABS 209C, PLA 210C). This allows for the temperature swings I get on the extruder, and caused no observable issues. When the extruder warms up to 225C, I clear the drippings, which can be substantial, then I loosen the tension screw on the MK5, and manually press the filament in to the extruder a couple inches, which clears out some of the melted PLA in the barrel. I then tighten the tension bolt and run the extruder motor from the control panel for 15-30 sec to make sure I'm getting a nice extrusion. I clear the extruded gunk, then start the print.
Between prints, I've noticed that if I let the extruder cool, then heat up again, it has a tendency to create a "gummy bear" plug in the extruder barrel. This can be pulled out and clipped off, as in the pic below, or just wait 5 min after hitting target temp to make sure the "gummy" has melted to goo before printing the next part.
 This is what happens when you get impatient and run the hot PLA part under cold water, rather than letting it air cool. I then popped it off with a pair of vice grips, and the long-suffering orange acrylic plate gave up the ghost. I had another orange plate, so I wasn't forced to mill something from aluminum , although that would probably be a good idea, longer term. When I put the new plate on, I tested printing on blue painter's tape, and that's working very nicely.
Wednesday, November 3, 2010
Crossroads
I've come to the tentative conclusion that the effective print size is limited to a base of about 2 inches square for colored ABS plastic without a heated print bed. "Natural" ABS is somewhat more forgiving, but the shrinkage of the material is still a significant concern. There are a couple options. I've ordered 5 lbs. of PLA from Makerbot and am looking forward to seeing how this material works out. I do have the heated print bed for the Cupcake, but I've not soldered it together, mainly due to having better things to do than painstakingly hand solder the many surface mount resistors in order to get it assembled.
Here's a picture of Marvin Mk2, a little bot that the MSU Robotics group designed and printed, other than the electronics and a few screws. The Mk1 is documented on Thingiverse, and Mk2 adds a servo to allow positioning of the optical sensor independent of the bot's movement direction. Currently Marvin motors forward until an obstacle comes within 20cm or so, then he turns left until the way is clear. I call it the hacky-sack program. There are plans to add maze solving to his programming, but even with the simplest of control algorithms, folks young and old are fascinated. Here's a test video of Mk1.
 We (MSU's McCoy Engineering School) took the Makerbot, robots Marvin and Charlotte to the Austin Science and Engineering Expo and to the MSU Majors Fair and they were all a huge hit. Even though the Cupcake refused to talk to my laptop at the Expo, I think we sold a few Makerbots, and probably could have sold more if they had sent me the marketing post cards that I requested! Ahh, well, with the endorsement of the mayor of New York City, who needs engineering schools, eh? (/wink)

 We (MSU's McCoy Engineering School) took the Makerbot, robots Marvin and Charlotte to the Austin Science and Engineering Expo and to the MSU Majors Fair and they were all a huge hit. Even though the Cupcake refused to talk to my laptop at the Expo, I think we sold a few Makerbots, and probably could have sold more if they had sent me the marketing post cards that I requested! Ahh, well, with the endorsement of the mayor of New York City, who needs engineering schools, eh? (/wink)
Wednesday, September 15, 2010
Pictures and Settings Update
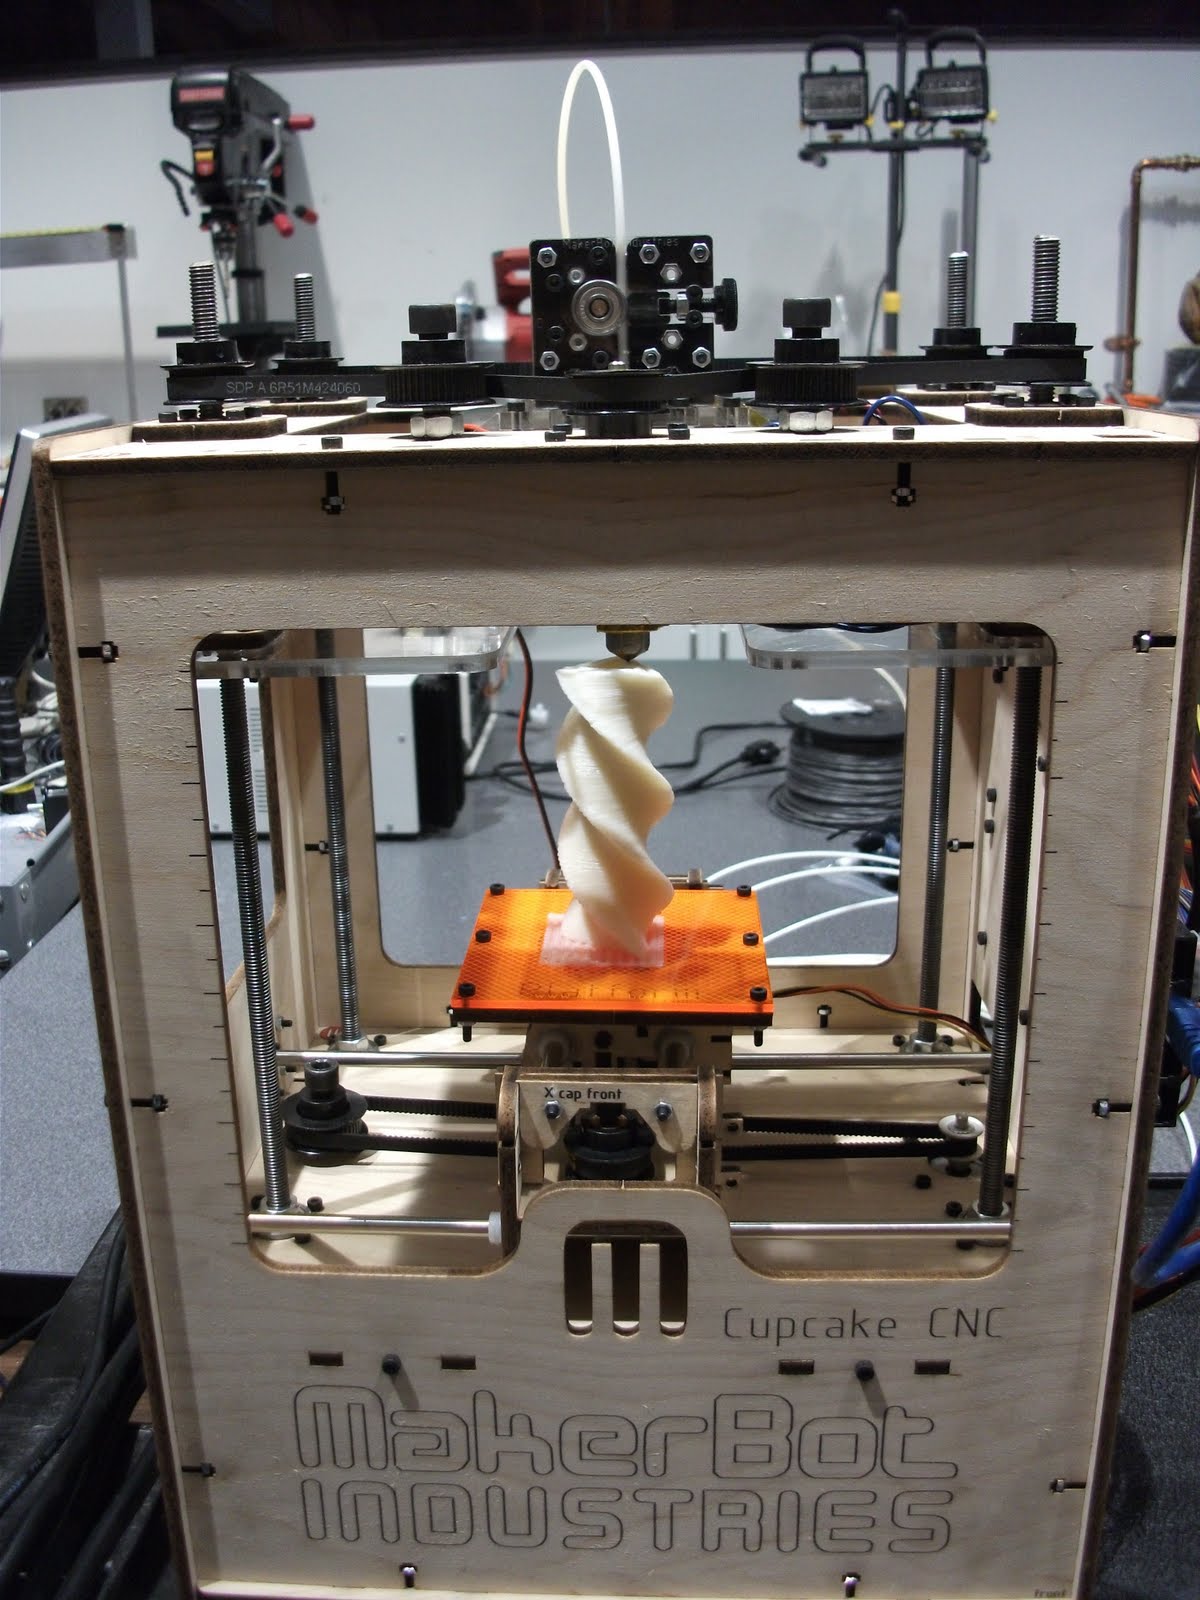
Hoeken's Twisted Form Study:
I can confirm that the PID settings work as advertised:
P: 11
I: 0.35
D: 110
Heat up time to 220C is 9 minutes, stablized at ±4C within 12 minutes.

Datafusions' ball(ball()) again, in creepy fleshtone: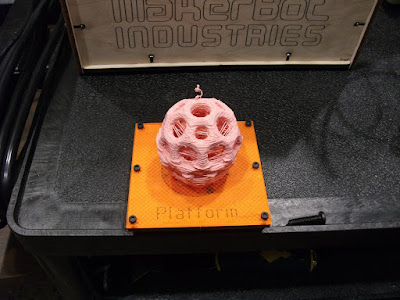
I can confirm that the PID settings work as advertised:
P: 11
I: 0.35
D: 110
Heat up time to 220C is 9 minutes, stablized at ±4C within 12 minutes.
I've settled on Skeinforge settings:
Carve:
0.35 layer thickness
1.7 Width/Thickness
Speed:
30 Feedrate
230 Flowrate
Thursday, September 9, 2010
Mk5 Temperature Settings
Here are some working temperature settings for my Mk5 Plastruder:
P: 7.0 I:0.34 D: 36.0
This produces a warmup time to 230C of around 9 minutes and temperature swings 230+8-15 (ish) for my Mk5.
I'm warming up to 230C manually, printing rafts at 235C and the rest of the part at 230C which is producing acceptable print quality.
I'd love to be able to reduce the swings drastically, since that should improve surface finish, but its far more critical that its printing reliably!
Friday, September 3, 2010
Mk5 Torture Test & Calibration
To put the Mk5 through its paces I decided to print datafusions' ball(ball()). As can be seen, about half way through, the cumulative error in Z calibration caused a major shift. I let it finish printing, partly just to see if it would and mainly to continue testing the Mk5 extruder. It finished in 1 hour and 34 minutes, with the extruder passing with flying color (beige).
 I then set about learning to calibrate the Z axis and learned a good deal about replicatorG, various calibration parts and skeinforge settings. It seems that simply setting the "carve" to 0.39 or 0.40 has reduced or resolved the issue. Each Cupcake is somewhat unique, so YMMV. I created a single walled, open, 10 & 20mm stairstep part as my own calibration piece and I'll have to upload it to thingiverse, soon. Note: Uploaded here.
Here are some of the fruits of the bot, so far:

Subscribe to:
Posts (Atom)
