Wednesday, September 15, 2010

Pictures and Settings Update

Hoeken's Twisted Form Study:

Datafusions' ball(ball()) again, in creepy fleshtone:

Thanks to the advice from sideburn and wajasn on the Makerbot wiki forum, my print quality has taken a jump upward. Here's the post.

I can confirm that the PID settings work as advertised:

P: 11
I: 0.35
D: 110

Heat up time to 220C is 9 minutes, stablized at ±4C within 12 minutes.

I've settled on Skeinforge settings:

Carve:
0.35 layer thickness
1.7 Width/Thickness

Speed:
30 Feedrate
230 Flowrate

Thursday, September 9, 2010

Mk5 Temperature Settings

Here are some working temperature settings for my Mk5 Plastruder:

P: 7.0 I:0.34 D: 36.0

This produces a warmup time to 230C of around 9 minutes and temperature swings 230+8-15 (ish) for my Mk5.

I'm warming up to 230C manually, printing rafts at 235C and the rest of the part at 230C which is producing acceptable print quality.

I'd love to be able to reduce the swings drastically, since that should improve surface finish, but its far more critical that its printing reliably!

Friday, September 3, 2010

Mk5 Torture Test & Calibration

To put the Mk5 through its paces I decided to print datafusions' ball(ball()). As can be seen, about half way through, the cumulative error in Z calibration caused a major shift. I let it finish printing, partly just to see if it would and mainly to continue testing the Mk5 extruder. It finished in 1 hour and 34 minutes, with the extruder passing with flying color (beige).

I then set about learning to calibrate the Z axis and learned a good deal about replicatorG, various calibration parts and skeinforge settings. It seems that simply setting the "carve" to 0.39 or 0.40 has reduced or resolved the issue. Each Cupcake is somewhat unique, so YMMV. I created a single walled, open, 10 & 20mm stairstep part as my own calibration piece and I'll have to upload it to thingiverse, soon. Note: Uploaded here.

Here are some of the fruits of the bot, so far:

Mk5: Plastruder Messiah*

* After a few, relatively minor improvements.


Although I was warned by the web site that it might be a few weeks before the Mk5 was delivered, I was happy to see it arrive within a few days. After an uneventful assembly and installation, I fired up replicatorG and pulled up the control panel to test the temperature and then extrusion capabilities.

Minor Improvement 1: For some odd reason, the Mk5 is glued (as was the Mk4) onto a piece that is bolted to the Z axis plate. This means that the glue is holding the Mk5 in place, which struck me as an invitation to pop loose at some inconvenient time. I simply drilled the holes wider and used a larger bolt and nut to bolt both pieces (on each side) at the bottom of the Mk5 directly to the Z axis plate. Since I had them handy, I used 1/4" machine screws and nuts, but a metric size would be more in keeping with the theme.


Minor Improvement 2: As soon as the temperature of the plastruder passed 185C, the solder joints bringing power to the resistors melted and the heater wires popped off. After some mucking about I settled on stripping the plastic off of some handy crimp rings, making some short shunts from a piece of #14 solid copper wire with a crimp ring on each end, crimping another ring to the ends of the feed wires, then using #2 bolts and nuts (again, metric would be politically correct) to bolt the rings directly onto the ends of the resistors, which come with handy #2 sized holes already in them. This avoided worrying about high temperature solders and how long the joints would hold.

Minor Improvement 3: Bolt the thermal cape to the top of the arch using the assembly bolts, and between the two layers at the bottom of the arch assembly. The fact that the Mk5 comes with its own cape strikes me as implying that perhaps it's a superhero rather than the messiah, but I'll leave my post title as is.

After this point, I'm happy to report that the Cupcake CNC began extruding its little heart out. I still had the heater PID set for the MK4, so to compensate, I simply set the temperature target at 240C. The temperature swung down to 215-ish at times, but ABS seems to melt down to about 208 or so, so I left the temperature adjustment to another day.

Issue2: Updates

After the MK4 Plastruder showed its unreliabilities, I decided to try to eliminate as many variables as possible to figure out where the problems really came from.

First step: Updating the firmware of both the motherboard and the extruder controller. This turned out to be more of an odyssey than expected, but I finally got the Cupcake CNC connected to a PC that had an internet connection, the correct java version to run replicatorG and the appropriate python version all at once. I then set about updating the firmware and ran across a number of head-scratchers in the wiki. Now that I reviewing the wiki, it appears that I was on a different page than the ones I'm searching up now, so it's likely operator error. For my own reference, at least, here's the procedure that worked:

Motherboard:
  • On a PC that has an active internet connection and is running replicatorG
  • Select the option to update the motherboard firmware
  • Follow instructions here until ready to press the Upload button
  • Press Upload button on replicatorG and immediately after, press the physical Reset button on the motherboard
  • Wait for the upload to complete and confirm

Extruder Board:

  • On a PC that has an active internet connection and is running replicatorG
  • Disconnect the USB2TTL cable from the Cupcake CNC motherboard
  • Connect theUSB2TTL cable into the extruder board's six-pin serial header, next to the reset button
  • Select the option to update the extruder firmware
  • Follow instructions here until ready to press the Upload button
  • Press Upload button on replicatorG and immediately after, press the physical Reset button on the extruder board
  • Wait for the upload to complete and confirm
  • Disconnect the USB2TTL cable from the extruder board
  • Connect the USB2TTL cable into the Cupcake CNC motherboard's six-pin serial header

Once the firmware was updated, I took apart the MK4 plastruder and installed the MK5 Drive Gear Upgrade Kit and printed a part. . .or, rather, didn't print a part or even do much more than extrude a few inches of material. After fiddling with the whole setup for a number of hours I came to the conclusion that, at least in my case, adding the MK5 drive gear made the MK4 platruder nearly unusable, rather than simply rather unreliable. I couldn't get the MK4 idler/pinch wheel to reliably hold tension against the MK5 drive gear.

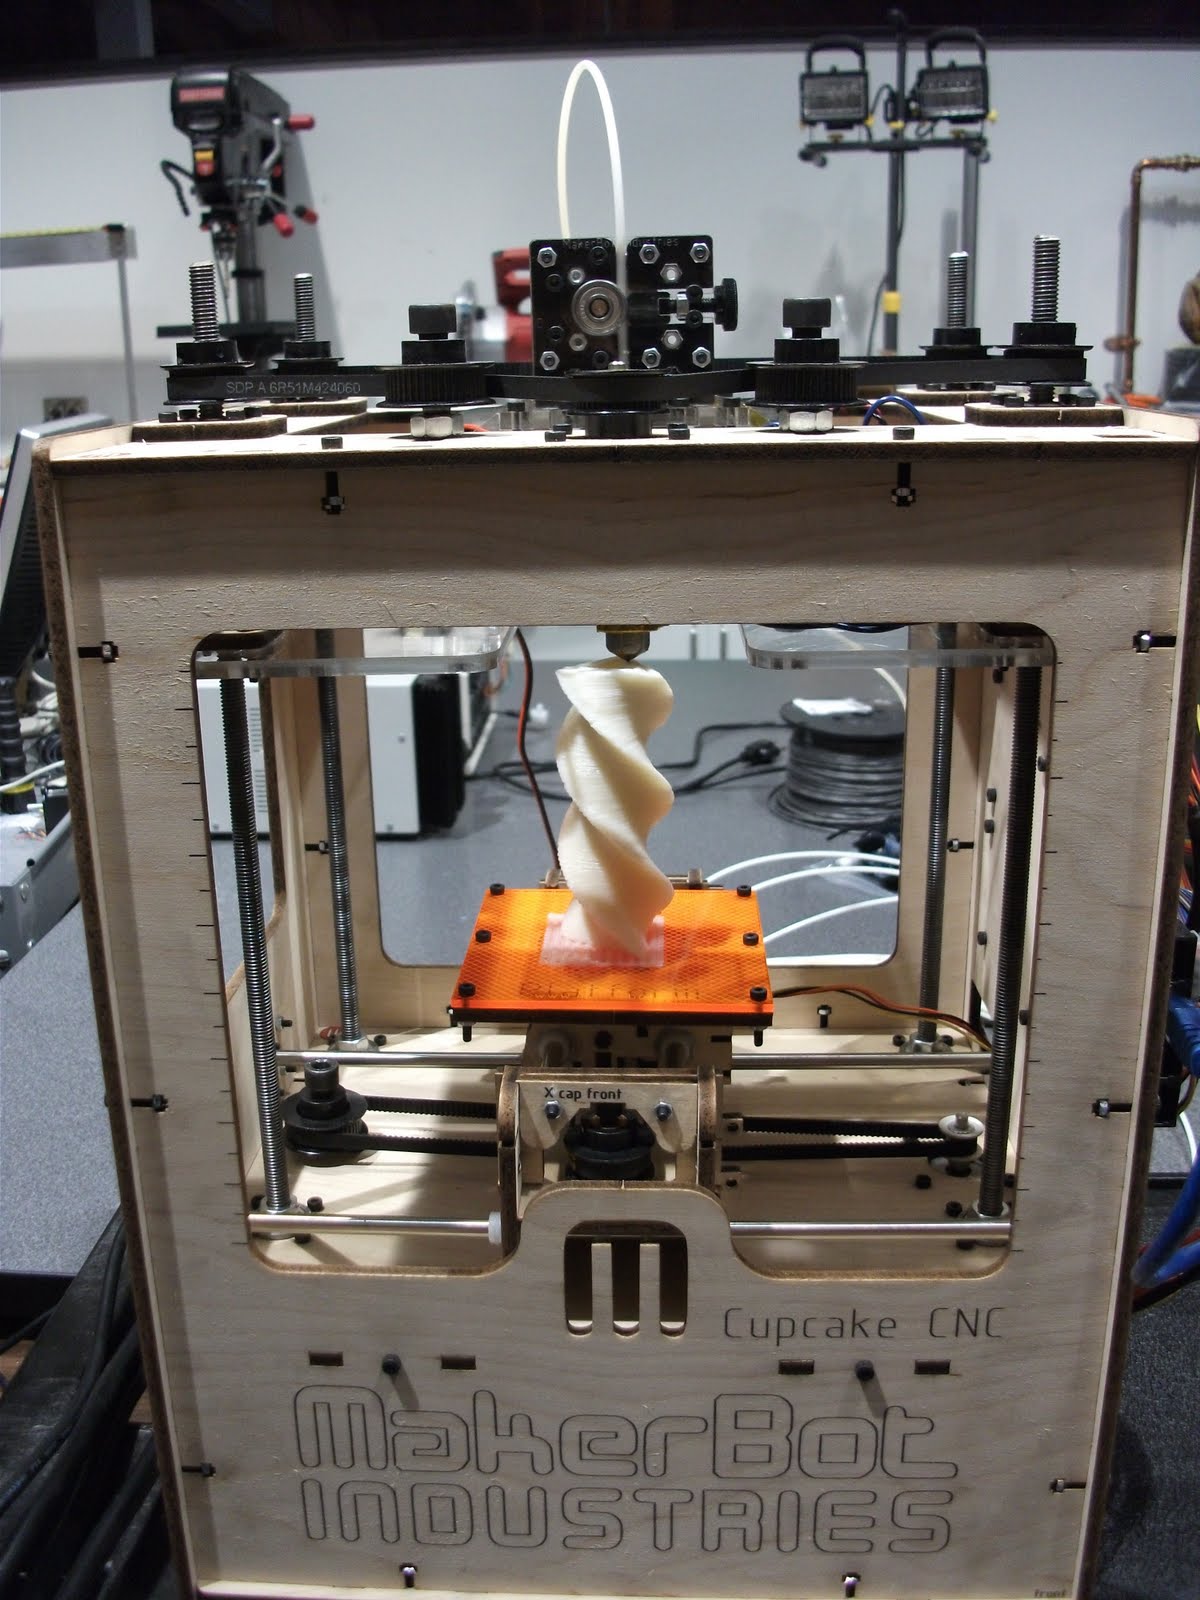
At this rather frustrating point I realized that my suspicions (from the start of assembly) about the unreliability of the MK4 plastruder were confirmed. As it stood, the Cupcake CNC's Cartesian drive system was useable, reliable and precise enough for prototyping work, but the extruder system was going to require a re-design.

Before I fired up SolidWorks and Mastercam and went to work, I decided to look around at options people have been coming up with around the makersphere. I lean heavily toward metal based solutions, being that I'm a machinist and having some experience now with the stresses the device was going to have to handle. As I was looking at several excellent designs that folks are using and considering the options, lo and behold, the MK5 was released.

After considering calling up Makerbot and demanding a replacement or at minimum an upgrade price, I decided that the department could affort to subsidize their work and just went ahead and ordered the MK5 plastruder.